Accessibility Checker in Microsoft Office
 Run the Accessibility Checker on any Microsoft file you add to your Moodle classroom or share with students.
Microsoft Office provides an Accessibility Checker that scans files to find elements of the document that may be missing which interferes with the accessibility of the files. Examples of elements it finds are missing headings, missing alt-text on images, repeated titles, excessive spaces, and other elements. The accessibility checker identifies warnings (items that must be resolved) and tips (which should be checked) to ensure accessibility.
Users of Office can highlight text, then use the text formatting tools in the ribbon to apply the styles and other tools.
To open the Accessibility Checker:
- Click the "Review" tab
- Click the button to start the "Check Accessibility" button
- The Accessibility Check pane will open on the right
Depending on the version of Office you have installed and how it is configured, the "Check Accessibility" button may not be visible. To open the checker, type "Accessibility Checker" into the "Tell me what you want to do" box in tabs.

Figure 1. The "Check Accessibility" button in the "Review" tab
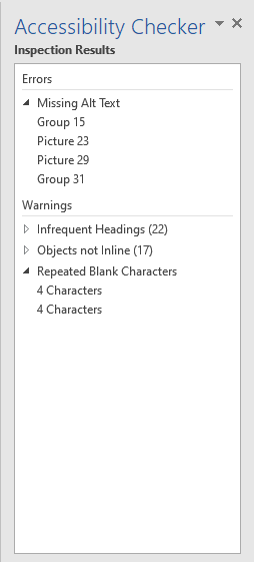
Figure 2. A screen shot of the accessibility checker in Microsoft Office showing errors and warnings
Learn more about Microsoft's Accessibility Checker in their support page.